Part 2: The Target — Hosting DVWA behind the Shield
Introduction
In the previous part, we laid the foundation by setting up our virtual network and pfSense firewall. Now, it’s time to bring in our first target: DVWA (Damn Vulnerable Web Application). In this post, we’ll focus on hosting this application behind our pfSense shield using Docker and configuring port forwarding to make it accessible.
4. Internet Access for Ubuntu
Since Ubuntu’s network settings restrict it from accessing the internet directly, pfSense must be configured to receive requests on its LAN interface, apply firewall rules, and forward traffic out via the WAN.
Why Ubuntu Can’t Reach the Internet by Default
pfSense is designed for the real internet, where private IPs (192.168.x.x, 10.x.x.x) are considered spoofed. In a VirtualBox lab:
- WAN is Bridged — gets an IP from your home router (e.g.,
192.168.1.10). - Kali is also Bridged — also has a private IP (e.g.,
192.168.1.15). - Conflict — Kali “attacking” pfSense WAN from a private IP gets blocked before any rules run.
Fix 1: Ubuntu DNS
If Ubuntu can’t resolve domain names, force it to use a public DNS server:
1
sudo nano /etc/resolv.conf
Add this line at the top:
1
nameserver 8.8.8.8
Save with Ctrl+O, Enter, then exit with Ctrl+X.
Fix 2: pfSense DNS Settings
If ping 8.8.8.8 fails, pfSense isn’t routing traffic correctly.
- Go to Services > DHCP Server.
- Under DNS Servers, enter your home router’s IP address.
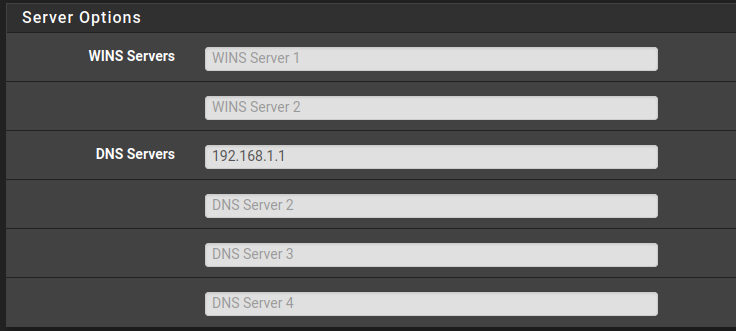
- Save.
Test connectivity from Ubuntu:
1
ping google.com
5. Redirecting pfSense to DVWA
5a. NAT Port Forwarding
- Navigate to Firewall > NAT in the top menu.
- On the Port Forward tab, click Add (up arrow).
- Configure as follows:
| Field | Value |
|---|---|
| Interface | WAN |
| Protocol | TCP |
| Source | Any |
| Destination | WAN Address |
| Destination Port Range | HTTP to HTTP |
| Redirect Target IP | 192.168.2.10 (Ubuntu VM) |
| Redirect Target Port | HTTP |
| Filter Rule Association | Add associated filter rule |
5b. Fix ICMP (Ping) Access from Kali
To allow your Kali machine to ping the pfSense WAN IP:
- Go to Firewall > Rules > WAN.
- Click Add (up arrow to place the rule at the top).
- Configure as follows:
| Field | Value |
|---|---|
| Protocol | ICMP |
| ICMP Subtypes | Echo Request (or Any) |
| Source | Any (or your Kali IP) |
| Destination | WAN Address |
- Save and Apply Changes.
Test from Kali:
1
ping 192.168.1.10
5c. Move pfSense WebGUI to a Different Port
pfSense uses Port 80/443 for its own admin panel. Move it so DVWA can use Port 80.
- Go to System > Advanced > Admin Access.
- Find TCP Port and change it to
8090. - Save.
Note: Your browser will lose connection. The GUI is now at:
- From Ubuntu:
https://192.168.2.1:8090- From Host:
https://192.168.1.10:8090
5d. Disable WebGUI Port 80 Redirect
- Log into the pfSense GUI at
https://192.168.2.1:8090. - Go to System > Advanced > Admin Access.
- Check the box: “Disable webConfigurator login redirect”.
- Save.
6. DVWA Setup
Install and run DVWA (Damn Vulnerable Web Application) using Docker on your Ubuntu VM.
Step 1 — Install Docker
1
2
3
4
5
6
7
8
9
sudo apt update
sudo apt install -y docker.io

# Start and enable Docker
sudo systemctl start docker
sudo systemctl enable docker

# Verify installation
docker --version
Step 2 — Fix Docker Permissions (Recommended)
1
sudo usermod -aG docker $USER
Log out and back in for this to take effect.
Step 3 — Pull and Run DVWA
1
2
3
4
5
# Pull the image
docker pull vulnerables/web-dvwa

# Run the container
sudo docker run --rm -d -p 80:80 vulnerables/web-dvwa
Step 4 — Access DVWA
Open a browser and go to http://localhost (or http://192.168.2.10).
- Username:
admin - Password:
password
Step 5 — Initialize the Database
Do not skip this step. After login, click “Create / Reset Database”.
Step 6 — Verify & Manage
1
2
3
4
5
6
7
8
# Check running containers
docker ps

# Stop a container
docker stop <container_id>

# Remove a container
docker rm <container_id>
Verification from Kali
1
curl -I http://192.168.1.10
A successful response looks like:
1
2
3
HTTP/1.1 302 Found
Server: Apache
Set-Cookie: security=low
This confirms the attacker has a direct path through pfSense to the vulnerable DVWA target.