Part 1: The Foundation - Virtual Networking & pfSense
Introduction
Welcome to the first part of our series on building a secure and scalable virtual laboratory. In this post, we will cover the foundational steps of setting up virtual networking and configuring pfSense as our primary firewall and router.
Network Topology 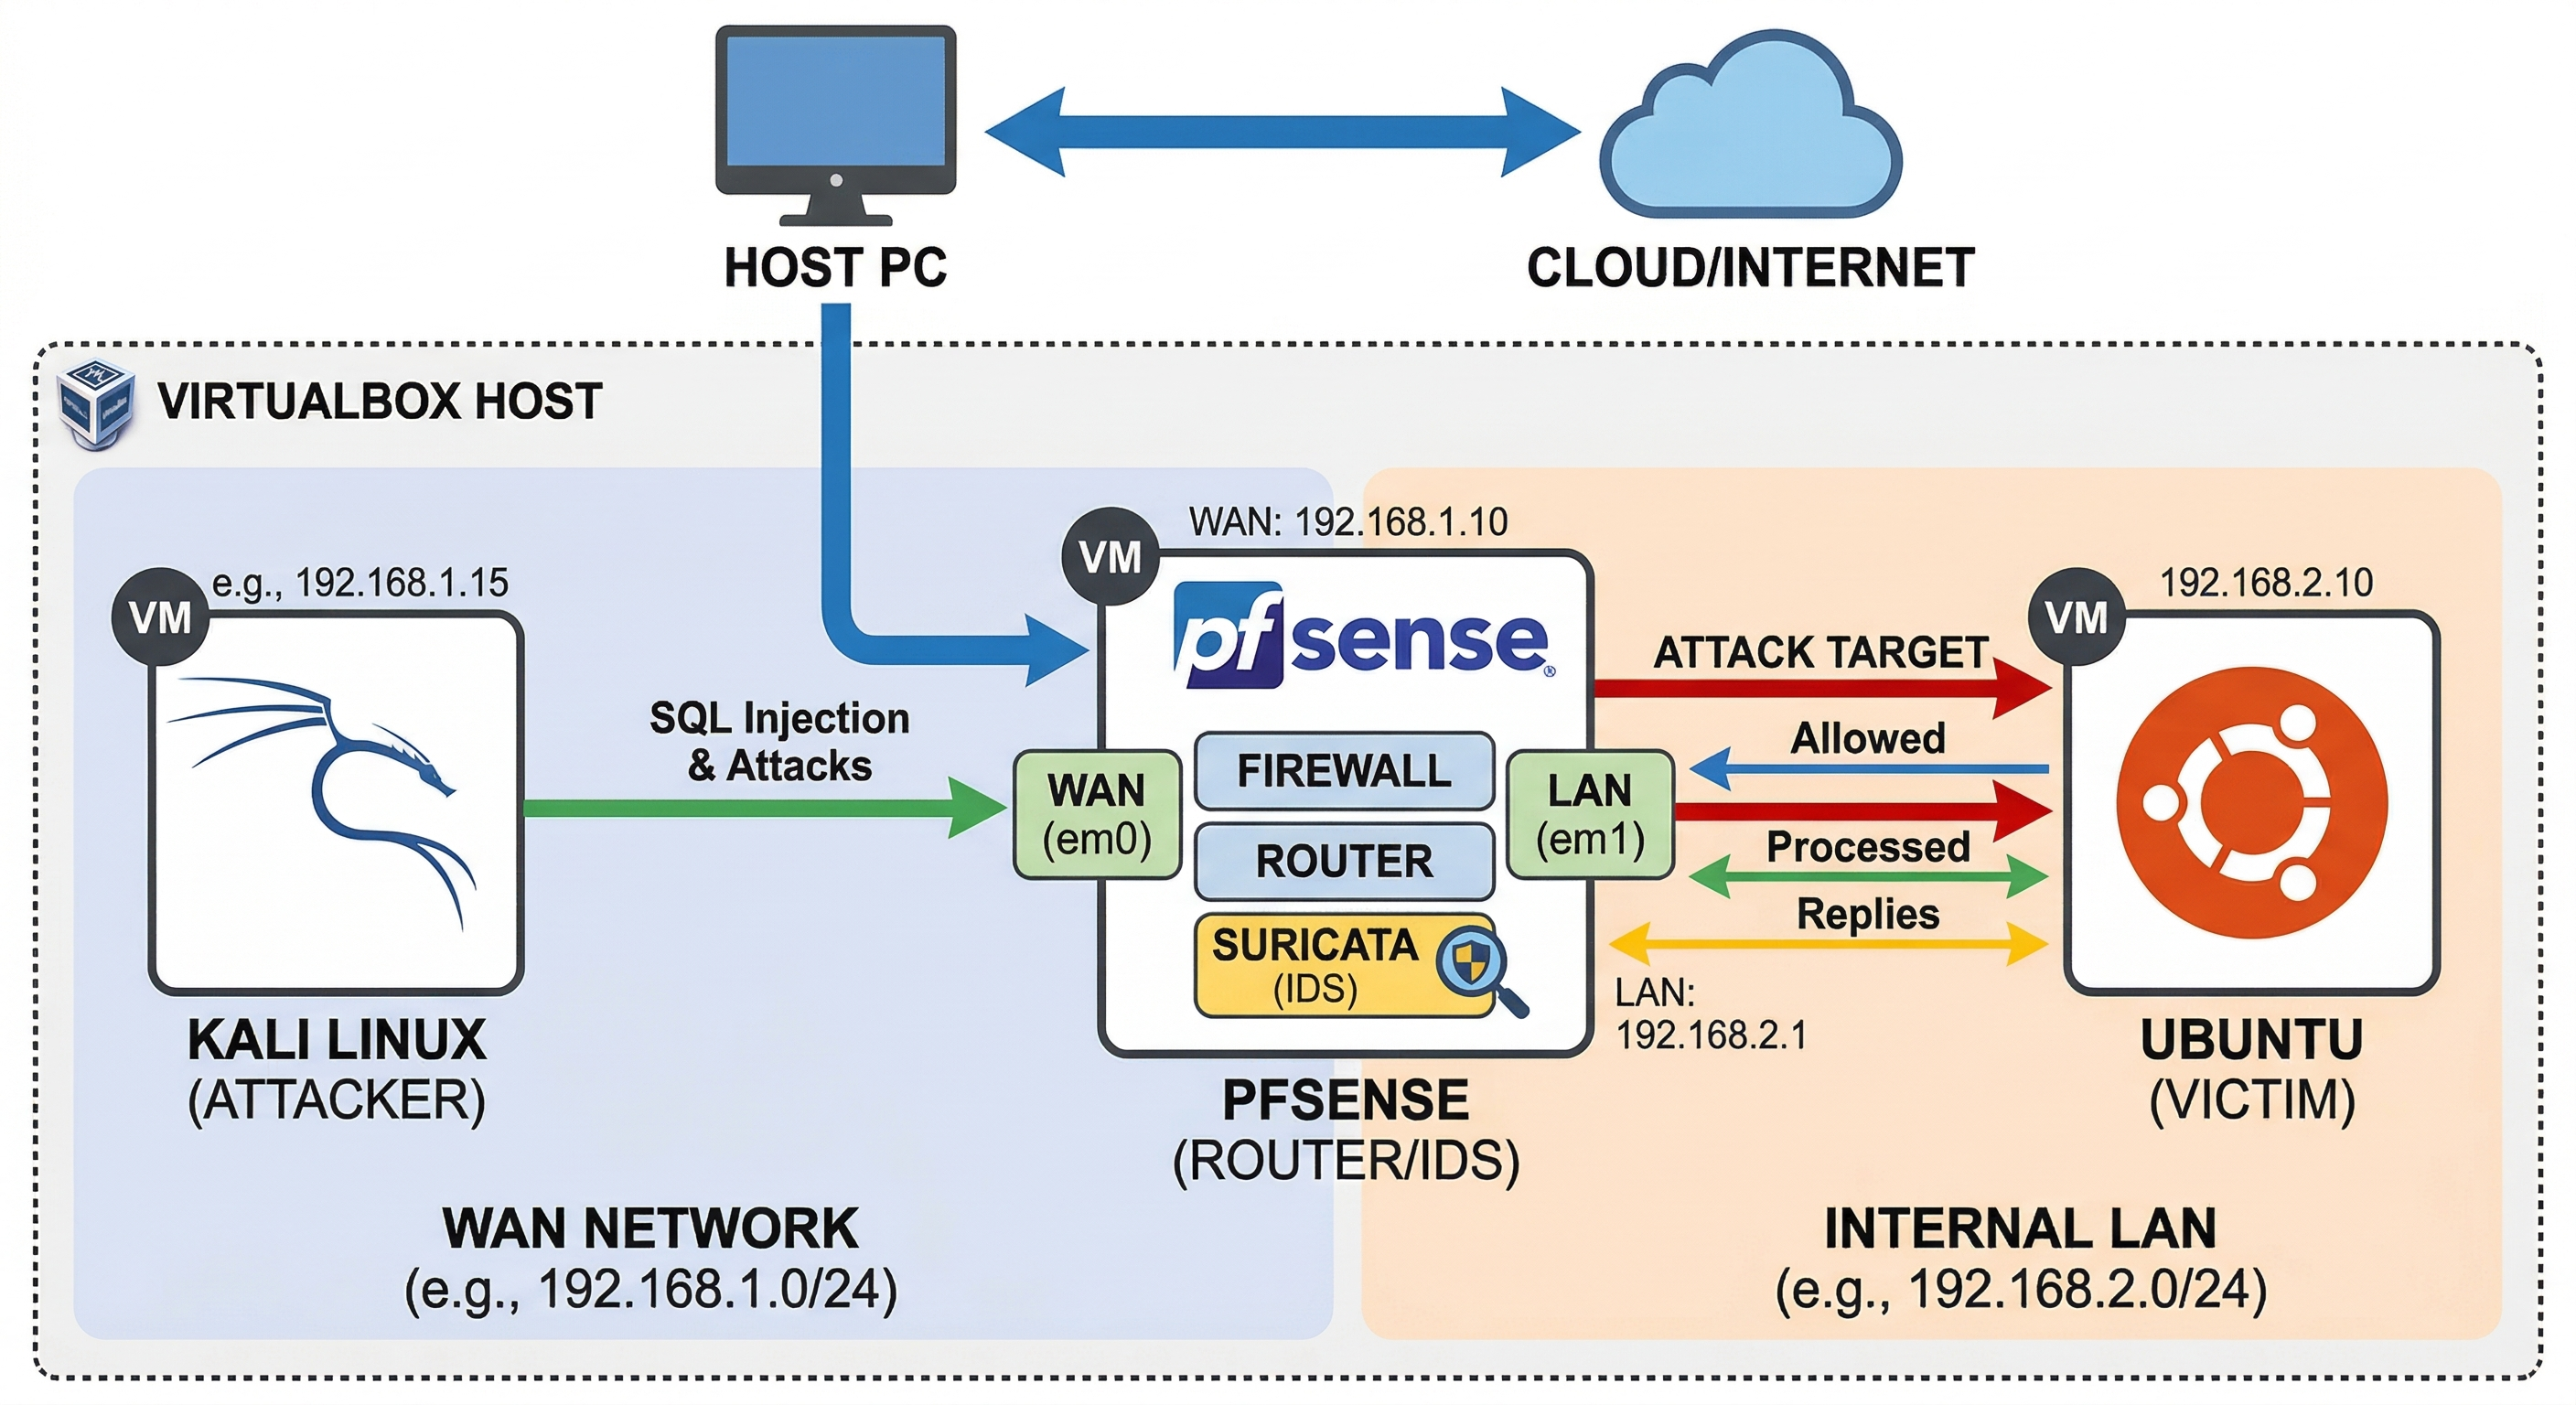
Make sure your to give atleast 4GB of RAM and 2 Processors to both Ubuntu and Kali VM for smooth performance.
Table of Contents
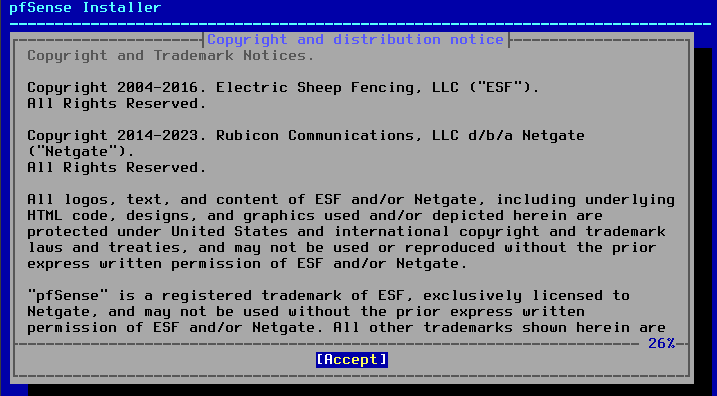
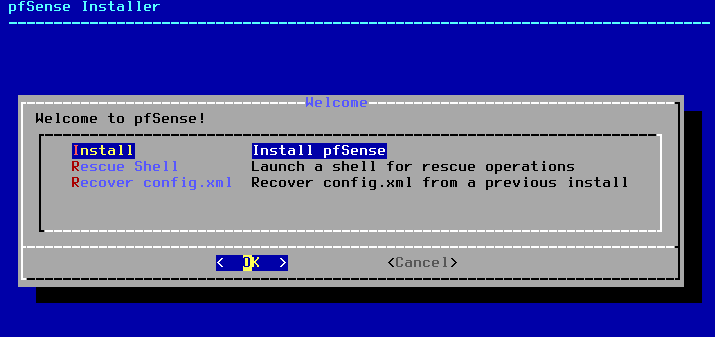
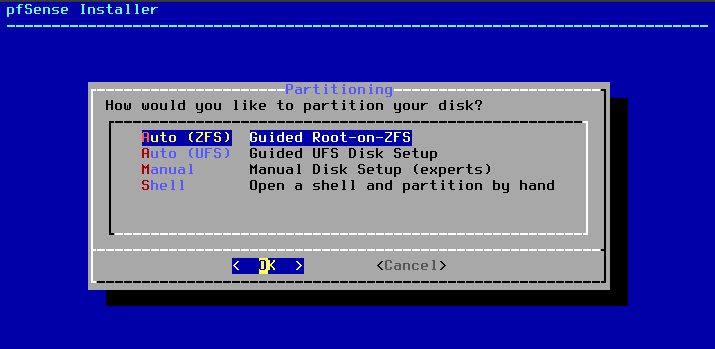
1. pfSense Installation
Boot the ISO
Follow the standard prompts in order:
- Accept the license agreement.
- Select Install.
- Choose Auto ZFS as the partitioning method.
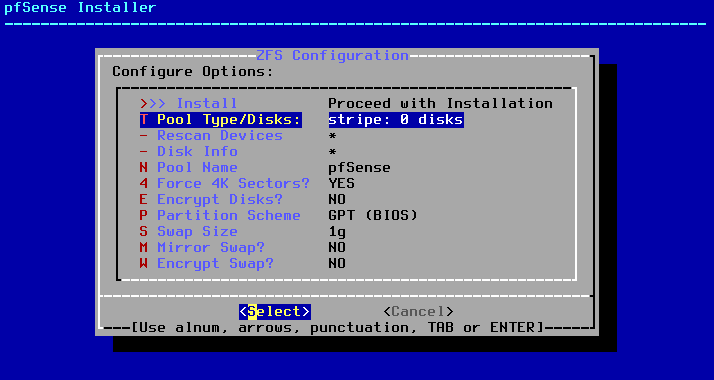
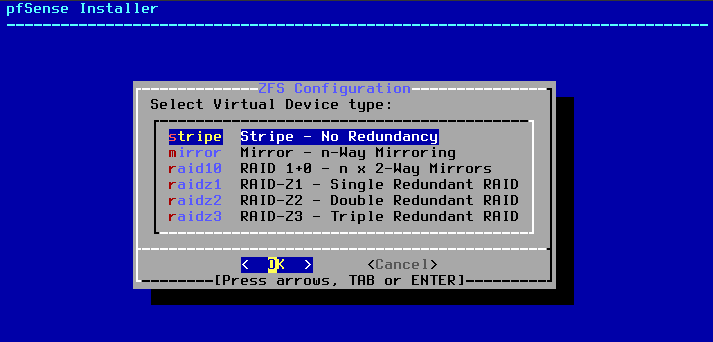
Select Disk & Pool Type
- Use your arrow keys to highlight T Pool Type/Disks and press Enter.
- Choose Stripe - since you only have one virtual hard drive assigned to this VM, this is your only valid option. Mirroring requires two or more disks.
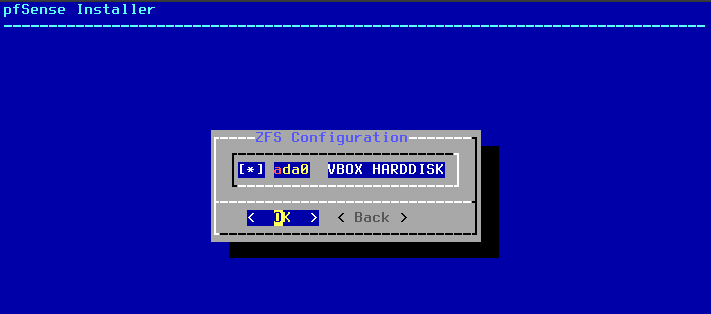
Mark the Disk (Critical Step)
On the disk selection screen:
- You will see your VirtualBox disk listed (likely labeled
da0orada0). - Do not just press Enter. Use the Spacebar to check the box next to the disk. An asterisk
[*]should appear beside it. - Press Enter to confirm.
Run the Install
- You will be returned to the previous screen, now showing
stripe: 1 disksat the top. - Highlight »> Install and press Enter.
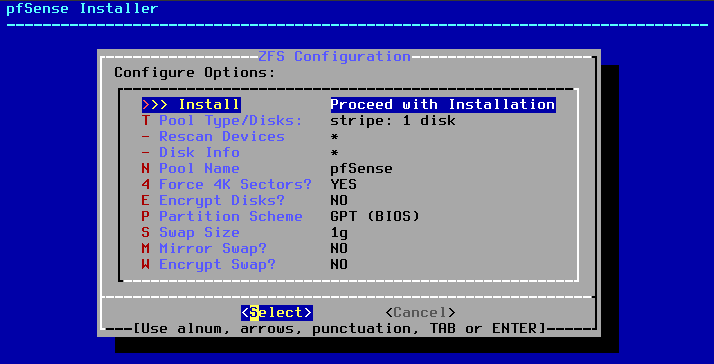
- When prompted to confirm, select YES - this wipes the virtual disk, which is fine since it is empty.
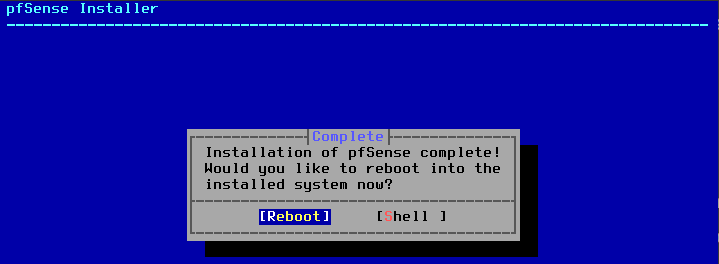
Post-Install
Once installation finishes, pfSense will ask if you want to open a Shell for manual modifications.
- Select No → Select Reboot.
2. WebGUI Access
The WebGUI Trap
By default, pfSense blocks WebGUI access from the WAN for security. Since your Ubuntu machine has no UI yet, you need to temporarily allow WAN access.
- In the pfSense console menu, choose Option 8 (Shell).
- Run the following command to temporarily disable the firewall:
1
pfctl -d
This disables packet filtering so you can reach the WebGUI from your host browser via the WAN IP.
Accessing the WebGUI
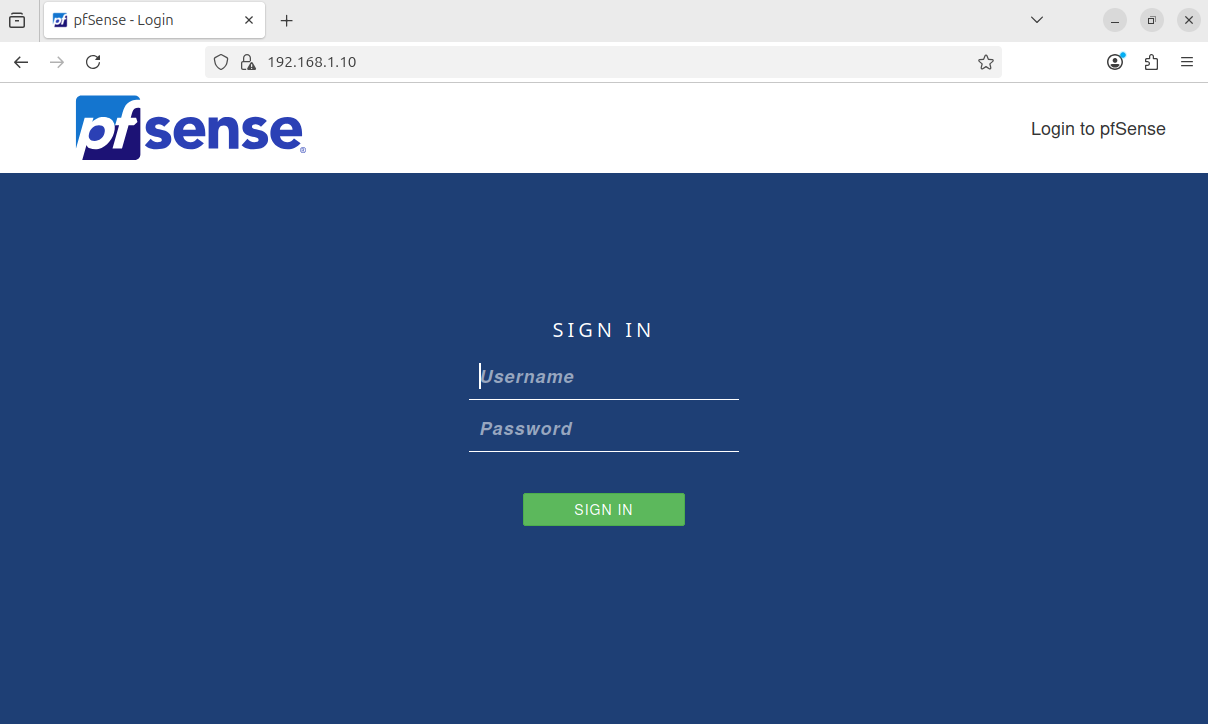
| Machine | URL | Role |
|---|---|---|
| Ubuntu VM | http://192.168.1.1 | Internal access (LAN - Trusted Zone) |
| Host Machine | http://[WAN_IP] | External access (WAN - Requires override) |
[!NOTE] Accessing the WebGUI from your Host Machine (WAN) is blocked by default. You must run
pfctl -din the pfSense shell to temporarily disable the firewall before you can reach the interface.
Default Credentials: admin / pfsense
3. LAN Interface Configuration
Run through the following prompts in the pfSense console to reconfigure the LAN interface:
1
2
3
4
5
6
7
8
9
10
11
Enter the number of the interface you wish to configure: 2 (LAN)
Configure IPv4 address LAN interface via DHCP? n
Enter the new LAN IPv4 address: 192.168.2.1
Enter the new LAN IPv4 subnet mask bit count: 24
For a LAN, press ENTER for none: [press Enter]
Configure IPv6 address LAN interface via DHCP6? n
Enter the new LAN IPv6 address: [press Enter]
Do you want to enable the DHCP server on LAN? y
Enter the start address of the IPv4 client address range: 192.168.2.10
Enter the end address of the IPv4 client address range: 192.168.2.100
Do you want to revert to HTTP as the webConfigurator protocol? n
Verification
After completing the above steps, the pfSense main menu should display:
1
2
WAN: 192.168.1.10
LAN: 192.168.2.1
Access the WebGUI from Ubuntu or your host browser and log in with admin / pfsense. Then set your username and password, click Reload, and click Finish.